MagicFlix 2: How do I create an AI Agent Video?
1 month ago
First of all, make sure that you already have a brand created, you can read this article on how to create a brand in MagicFlix
- Log in to your MagicFlix, then click on Create either the button to the right, or the create tab to the left, and select “AI Agent Video”
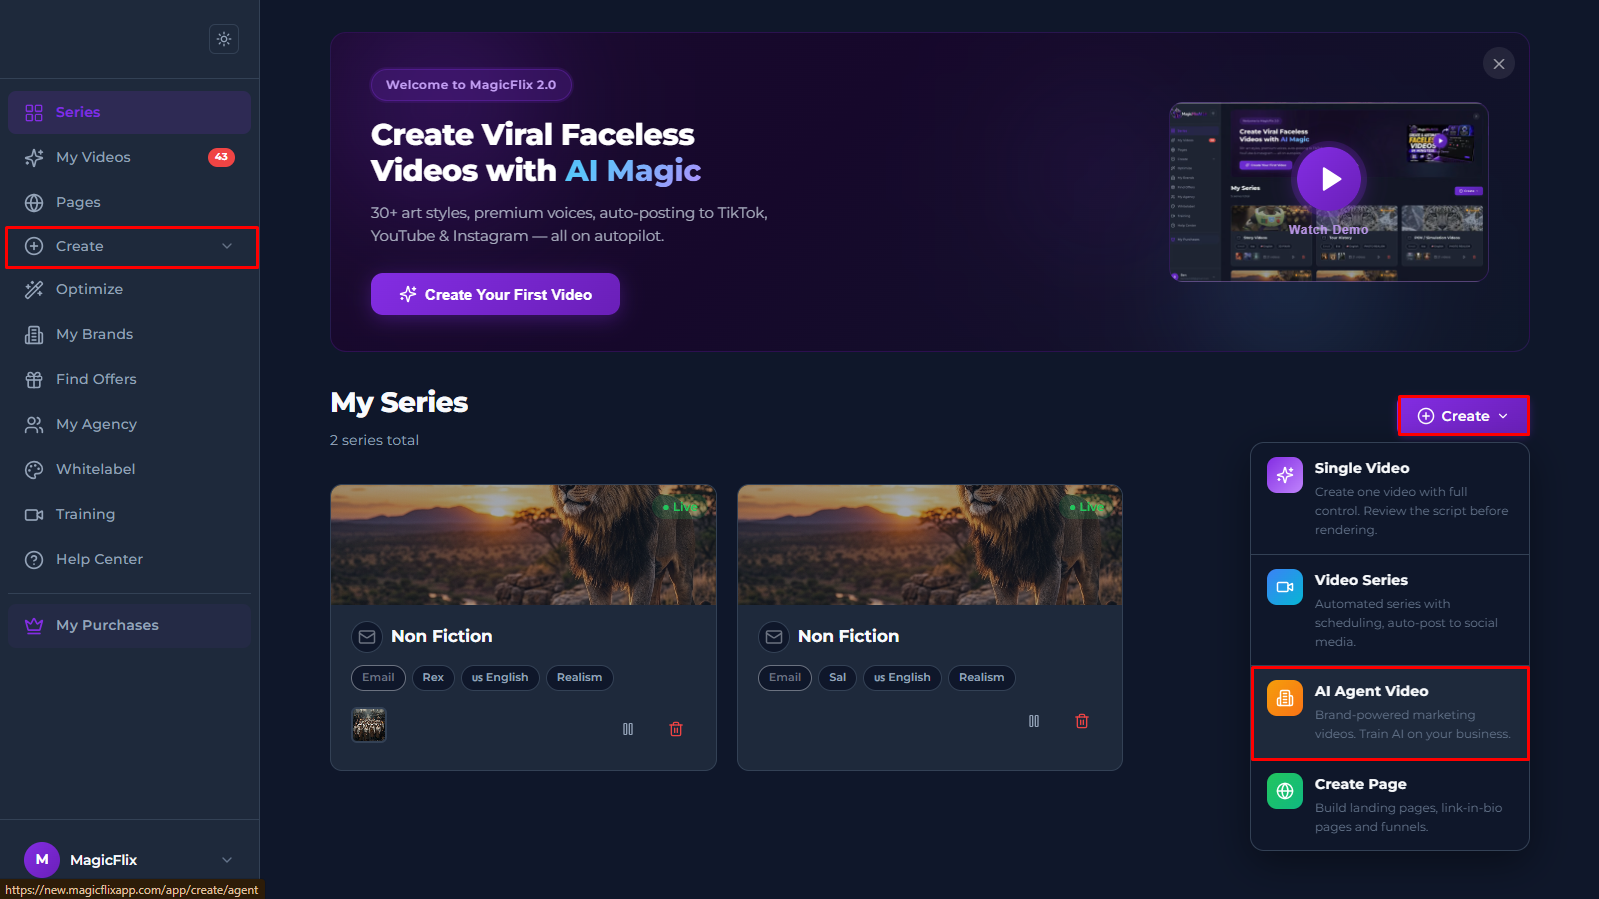
- Here you can create you AI Agent Video
- Brand: Start by selecting the brand you have already created, if didn’t create one, you will need to create it first.
You can read this article on how to create a brand [INSERT LINK] - Campaign Goal: Select your goal with this campaign, for example: Promo/sale or Product Feature. You can also select a custom goal and tell the AI exactly what your goal is.
- Aspect ratio: Select your desired aspect ratio.
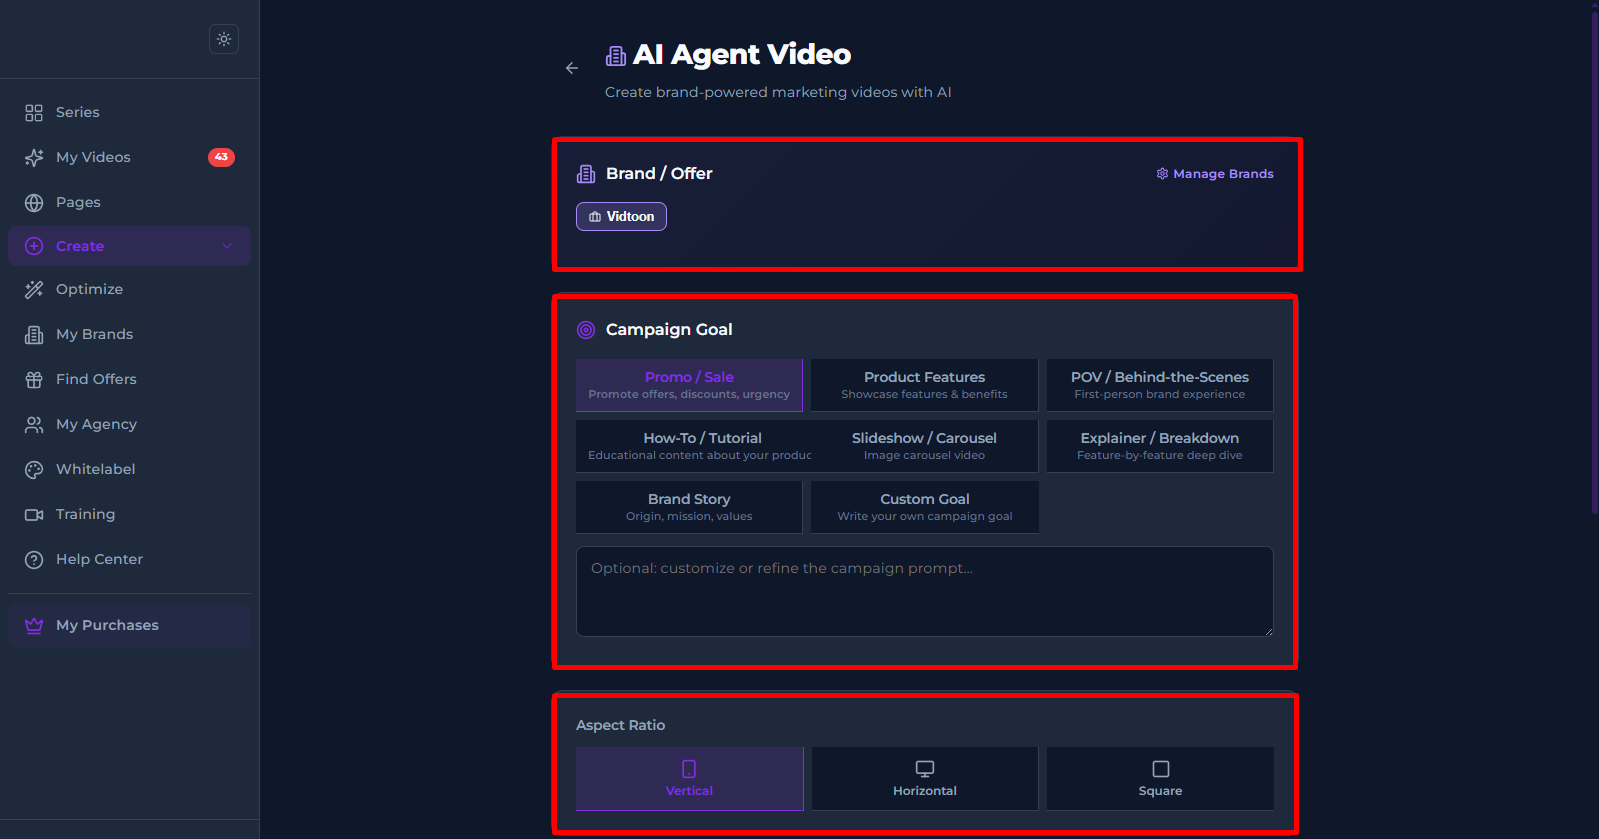
- Brand: Start by selecting the brand you have already created, if didn’t create one, you will need to create it first.
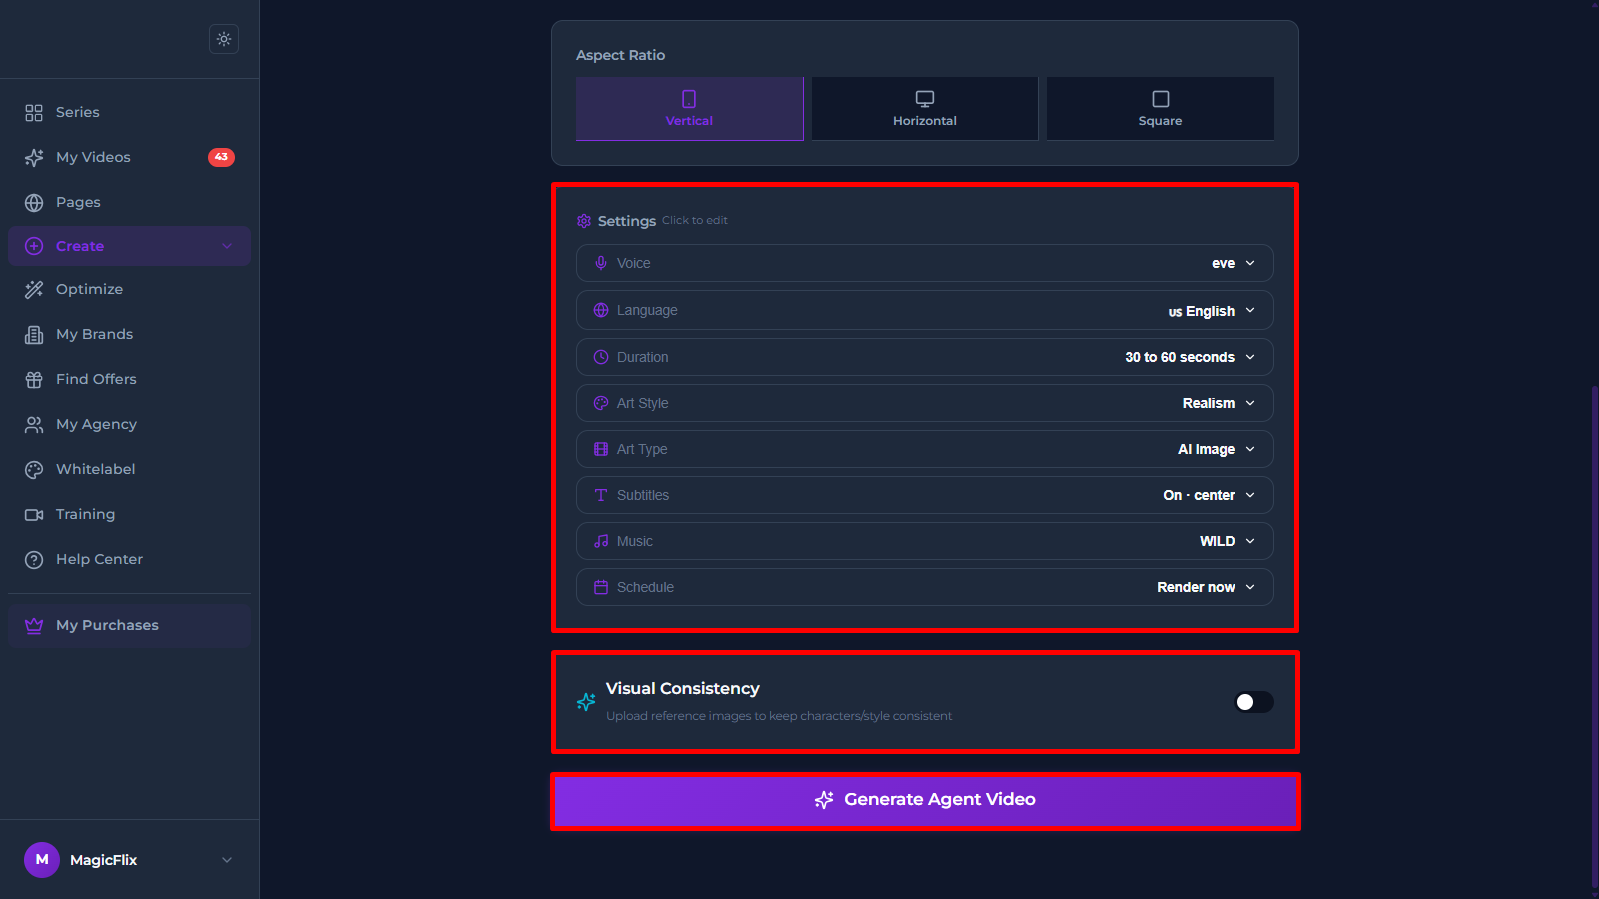
- Settings: Here you can pick everything directly related to your video
- Voice: Pick the TTS model you want and the Voice to narrate your videos, you can click on the voice to preview it.
- Language: Pick the language of your videos
- Duration: Pick the duration, whether you want a long video or a short one
- Art type: Choose whether you want the ai to generate Images or Videos
- Art style: Pick your favorite art style (Realism, Illustrative, Oil painting, …)
- Subtitles: Enable or Disable subtitles and customize them to your liking
- Music: Pick on of the existing music packs or upload your own music
- Schedule: You can render the video right now, or schedule it for a later specific date of your choosing.
- Visual Consistency: This allows you to:
- Upload Visual assets to help the AI make videos with visuals consistent with your preferences
- Describe your character or style, this allows you to tell the AI exactly how your character or the style of the video will look like.
- Once you are done click on “Generate Agent Video”
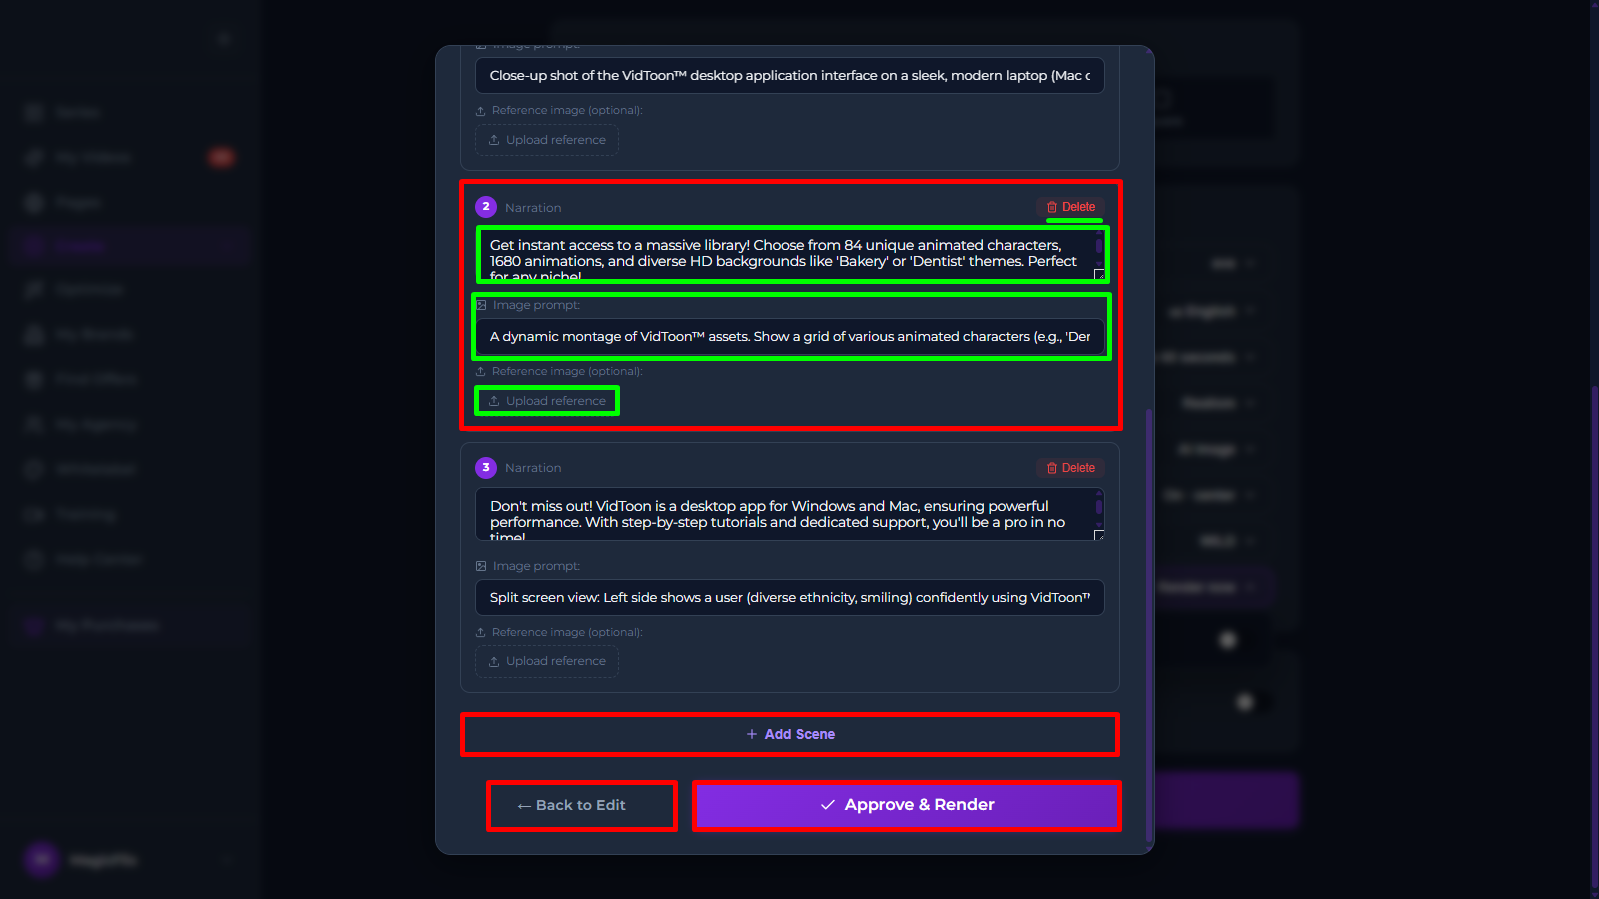
- Review your Script:
- Scenes:
- First you can delete any scene that you done want
- You can review and edit your script for the Text-to-Speech
- You can review and edit your Image generation prompt
- Upload any
- You can add new scenes
- If you need to make further changes, you can click on “Back to Edit” to go back and change anything.
- Once you are done click “Approve & Render”
- Scenes:
- Your video will now render, and you will be able to post or download it
Still No Luck ? We can help you
Create a ticket, we’ll get back to you as soon as possible.
Submit a Ticket